Friday 5 March 2021

Ossobuco alla Milanese


Festive season, with days between the main events, calls for a family pleaser prepared ahead and reheated when needed. This Northern Italian staple is earthy, hearty and more on par with rich Central European flavours than the usual fresh Mediterranean dishes we love to cook. When beef shanks, cross-cut to expose the bone marrow, are slow cooked with root vegetables, the layers simmer down to a deeply satisfying thick stew. However, the grand finale sprinkling of zesty gremolata gives this dish that unmistakable Italian accent. Served with saffron risotto makes a perfect combo, but goes just as well with simple pappardelle or polenta.


Ingredients for 4 servings

If you want to have some leftovers, simply double the recipe quantities. Please do not substitute the meat cuts, oozing bone marrow is necessary to round up this dish, literally translating from Italian to ‘bone with a hole’.
  • 4 veal or beef shanks (approx 330g each, 3-4cm high)
  • white flour, as needed
  • 60 g butter
  • 1 medium size onion
  • 2 small carrots
  • 2 sticks of celery
  • 1 dl good-quality, dry white wine
  • 1 dl beef broth
  • white pepper
  • salt

  • Gremolata alla Milanese:
  • 1 handful of chopped parsley
  • zest of one lemon
  • 1 large clove of garlic
  • 2 anchovy fillets (optional)

  • OPTIONAL
  • a small amount of chopped tomato, or tomato paste 
  • extra virgin olive oil in addition to butter or as butter substitution
  • depending on the broth quality you can add bouquet garni

  • Note: The original, centuries-old recipe for ossobuco calls for it to be made in bianco, meaning without tomatoes. Tomato, brought to Europe by Spaniards in the 1500s, was long believed by many Italians to be inedible or even poisonous, and although it gradually made its way into southern dishes, it wasn't until the late 19th century that it first began appearing in recipes for Milanese-style ossobuco.

  • Method
  • Make small cuts along the edges of veal shanks, as that will prevent the meat from shrinking during cooking.
  • Sauté onion, carrots and celery in butter, until softened, then transfer them to a plate. Dip the veal shanks in flour, patting off any excess.
  • In the same pan, brown the veal shanks on each side, then add the carrots and onions and pour in the white wine. Lower the heat, and wait until the wine evaporates.
  • Next, pour in the broth into the pan and season with pepper and salt. Cover with a lid and let it simmer, turning the meat from time to time, or adding more broth if necessary (at this point you would add tomatoes, if using).
  • The meat is done when it falls off the bone. At that point, put ossobuco on a serving plate, top the meat with gremolata, and then pour them over with the sauce from cooking.

Friday 7 September 2012

Saltimbocca alla Romana


Italian for “jump in the mouth”, saltimbocca is a classic Roman dish. Surprisingly though, there are countless variations as it is quite popular in Switzerland, Spain and Greece, but the commonality across all interpretations of this timeless Italian number is the distinct peppery flavour of sage and the richness of prosciutto. Saltimbocca is a dish that will  entice a loud mmm approval at an Italian restaurant, so amazing in its vibrant simplicity you’ll end up charming the waiter to reveal the chef’s recipe. Simple, elegant and delicious!


Ingredients

Serves 4

500g thinly sliced veal cutlets (scallopini)
8-10 fresh sage leaves
150g thinly sliced prosciutto
salt and freshly ground black pepper
2 tbsp olive oil
1 tbsp butter
½ cup almonds, chopped (optional, if you like a bit of crunch)
4 tbsp liquid honey
½ cup dry white wine

Method:
  1. Put the veal cutlets side by side on a sheet of plastic wrap. Season well, with salt and pepper. Rub each cutlet with a sage leaf, pressing hard on the meat.  Lay a piece of prosciutto on top of each piece of veal and cover with another piece of plastic. Gently flatten the cutlets with a rolling pin or meat mallet, until the pieces are about 1 cm thick and the prosciutto has adhered to the veal.
  2. Remove the plastic wrap and place a sage leaf on the top of prosciutto, weave a toothpick in and out of the veal to secure all the layers.
  3. Heat the oil and 1 tablespoon of the butter in a large skillet over medium heat. Drop in a few more sage leaves used for rubbing the meat. Put the veal in the pan, and cook for 2-3 minutes flipping the pieces often to crisp up. You can leave the sage leaves in or fish them out at this point as they are quite aromatic.
  4. Stir in the chopped almonds (if using), heat them up to let out the almond scent, then add honey and mix well. Add the wine, stirring to bring up all the delicious flavour from the bottom; let the wine cook down for a minute to burn off some of the alcohol. Swirl the pan around, pouring the sauce over the meat, and let simmer for just a minute.  
  5. Transfer the saltimbocca’s to a serving platter, take out the toothpicks, and serve immediately.


Piroške (Pirozhki)


Originally a Russian deep fried treat, pirozhki are quite a popular snack food in Central and East Europe, and even parts of Asia. The name derived from the Slavic word ‘pir’ which means a banquet or a festivity. Today, as all foods that travelled across borders and settling into regional cuisines, pirozhki appear in several different forms with a variety of fillings. But all recipes seem to have one thing in common; this baked or fried stuffed bun always turns out into a successful crowd pleaser. My grandmother used to make piroške filled with potato and bacon as a side to a thick creamy spinach soup. Then, my cousin and I would dunk piroške in the soup, instead of using our spoons, mopping our plates clean. Nowadays, baked piroške filled with cottage cheese are a favourite snack on kids play days. Beside happy smiles all around the table, they also ensure for a good 10 minutes of blessed peace and quiet while kids munch away, swinging their legs under their chairs.


Ingredients:

Yields 12-14 pieces

Dough:
500g plain flour
7g (1 tbsp) active dry yeast
1 tsp salt
250ml (1 cup) milk, warm
50g butter, melted
Filling:
250g cottage cheese
50g butter, melted
1 tsp salt
Topping:
100ml sour cream 
2 eggs

Method:
  1. Put all the flour in a big mixing bowl and make a well in the centre. Add yeast into the well and pour in the warm milk. Mix the yeast and milk lightly and leave for 10-15 min for the yeast to activate.
  2. Add rest of the dough ingredients into the flour and mix well. Place on a wide surface and knead into soft dough (the dough should be slightly greasy and elastic, so do not add any more flour). Return dough into the mixing bowl and leave to rise in a warm place, for about 20-30 minutes. Now, combine all ingredients for the filling.
  3. When the dough is doubled in size, place again onto a wide surface and roll out into a 1 cm thick, very long rectangle, spread half a filling mixture and fold the rectangle over in half. Roll out again, pressing gently and spread the other half of the filling; fold over again. Pinch the edges to secure the filling inside. You should end up with approx. 15 cm wide and about 30-40 cm long rectangle.
  4. Cut the dough in stripes (about 2 cm wide) and twist twice while holding the top edges together and place into a baking tray, lined with baking paper. This part can get a bit messy with cheese oozing out, so gently push the cheese back in without squashing the piroške down. Leave space between them as they will expand during baking. When all the piroške are lined in a tray leave them for another 20 minutes in a warm place to rise a bit.
  5. Mix the ingredients for the topping and brush all the piroške generously with the mixture. Bake for about 30-40 minutes in a preheated oven on 180*C.
  6. Serve warm, or cold. They will keep well in an airtight container for a couple of days.


Monday 3 September 2012

Maultaschen (Schwabian Pasta Parcels)


Legend has it that in the 17th century, a resourceful monk at the Maulbronn monastery sought to conceal his appetite for meat during the Lent, so he mixed the meat with spinach and wrapped it in noodle dough to hide it from God, hence the nickname ‘Herrgottsbescheißerle’ (God Cheaters). Maultaschen became wildly popular in Germany and were traditionally served on Maundy Thursday and Good Friday. My paternal grandmother used to call them ‘taschkerle’ in her Eszekerisch slang and would fill them with a mix of spinach and leftover sausage meat, then cook in beef broth and serve with boiled potatoes dredged in fried onions. Whether just boiled, fried in lard or geschmälzt (cooked and folded into fried breadcrumbs) – this Swabian specialty is irresistibly delicious.


Ingredients

Serves 4

Dough:
2 cups plain flour
2 eggs
4 tbsp cold milk
Salt

Filling:
300g bratwurst sausage mix
200g spinach, blanched and finely chopped
½ cup bread crumbs
1 egg
Marjoram, pinch
Pepper, pinch
Nutmeg, half a pinch
100g smoked bacon, finely diced
1 egg white
2-3 cups beef stock

Method:
  1. Prepare noodle dough by kneading flour, eggs, a pinch of salt and water; roll out very thinly. Mix together the sausage meat, parsley and egg. Blanch spinach, drain, chop finely and add to the meat mixture. Season with salt, pepper, marjoram and nutmeg. Braise diced, smoked bacon and add to mixture.
  2. Cut dough into 15 cm squares and spread a liberal amount of filling on them. Brush edges with egg white; fold squares over to form triangles and secure edges tightly, press the edges with a back of the fork to seal the filling inside.
  3. Simmer the parcels in hot broth for about 10-15 minutes (do not boil).
  4. Serve in broth, sprinkled with chopped parsley. If you have any leftovers the next day, cut the Maultaschen in stripes, reheat on the bed of fried onions, and serve with boiled potatoes.

Note: By old German tradition the serving suggestions are as follows: on Holy Thursday, serve them in broth. Fry them in fat and onion on Good Friday. And if any remain, bake them on Saturday with a little cheese and serve with potato salad. 


Thursday 30 August 2012

Langoši (Lángos)


This delicious Hungarian fried flat bread is the most popular Central European street food. In the old days, the traditional lángos was baked outdoors in front of flames of the brick oven and served topped with sour cream and cheese for breakfast. Modern cooks adopted a faster method with yeast dough fried in oil. In Hungary, Austria and Romania lángosi are often cooked at fairs and festivals, served with variety of toppings. In Czech Republic, Slovakia and Croatia you’ll find langoši in snack bars, and in my family - they are served as the ultimate party appetizers. 


Ingredients:

Yields about 15 medium sized pieces

500g plain flour
7g (1 tbsp) active dry yeast
250ml plain yoghurt, at room temperature
200ml milk, warm
1litre vegetable oil (sunflower or canola)
Salt

Method:
  1. Prep the yeast first. Warm up a big metal mixing bowl and pour in all the flour. Make a well in the centre, add yeast and mix in the warm milk. Cover with cling film and let stand at the warm place for about 10-15 minutes.
  2. When the yeast has foamed up, add the yoghurt and mix into a very sticky dough. Work the dough for about 5 -10 minutes with a wooden spoon and refrain from adding flour, it’s meant to be quite soft and sticky. Splash with a little oil, cover with cling film and let the dough raise overnight (or for at least 5-6 hours).
  3. When the dough has more than doubled in size, punch it down and make the langoši. Grease your hands with a little oil, pinch off some dough (a bit bigger in size than a golf ball), roll it in your palms and then stretch it out with your fingers. The dough will be quite elastic and easy to shape. Make it thinner in the middle and about 1 cm thick at the edges, and then place each flat piece into the hot oil.  Make sure the oil is quite hot and that there is enough room for langoš to quickly drop down to the bottom of the pan and then immediately rise up to the surface, where it will puff up and remain floating.
  4. Fry each side for about 2 minutes, until it is golden brown and nicely crisp (it will soften as it cools down).  When each langoš is fried place it on a paper towel to absorb the excess grease.
  5. Salt them while they are still warm, and ideally let them cool down before serving.

Tuesday 28 August 2012

Baklava


This syrupy dessert is an absolute epitome of oriental decadence. The recipe has been floating around the noble kitchens of the Middle East and Eastern Mediterranean for centuries, but today’s popular form has been adapted from the ancient original in the Ottoman imperial kitchen at the Topkapi Palace in Istanbul. It is considered a national dish in Turkey, Greece, Egypt and Armenia, and each country proudly treasures its own favourite recipe. I’ve always liked the traditional Turkish baklava, until I’ve tried the Egyptian one and got permanently seduced by its aromatic sweetness. The key elements are exactly the same, but the Egyptian secret lies in two additional ingredients that suit my taste buds, cinnamon and orange blossom water.  Heavenly! 


Ingredients:

Yields about 20 square slices

400g walnuts, coarsely ground
100g unsalted pistachios, finely chopped
80g brown sugar
2 tsp cinnamon
20 sheets filo pastry
80g butter, melted

Syrup:
375ml (1 ½ cups) water
200g (1 ½ cups) caster sugar
2 cinnamon sticks
1 whole lemon, juice only
2 tbsp orange blossom water

Method:
  1. Make the syrup first as it needs to cool completely before pouring into the slices. Combine water, sugar, lemon juice and cinnamon sticks in a pan, and cook over a low heat until sugar dissolves. Bring to a short boil, stir in the orange blossom water, remove cinnamon and set aside to cool.
  2. Preheat oven to 180°C. Grease 20cm x 30cm baking tray with oil. Combine the nuts, sugar and cinnamon.
  3. Begin assembling the pastry stacks by layering 5 filo pastry sheets, brushing each with butter first, then placing into the baking tray. Top with one-third of the nut mixture. Repeat layers, finishing with filo, and lightly butter the top pastry sheet.
  4. Dip a sharp cutting knife into hot water, and then cut baklava into square shapes. Do not cut all the way through, but only about half way – that will allow the top layers to nicely puff up during baking. Bake for 30-40 minutes, until golden brown.
  5. Now cut the slices all the way through, and then pour half of the cold syrup along the cut lines and let cool slightly, allowing the bottom layers to soak up the liquid. Then pour in the rest of the syrup along the lines, and let baklava cool down completely before serving.

Sunday 26 August 2012

Greek Moussaka


This soft and rich dish takes time to put together, but it is so worth the trouble. The cooking method of stacking individually cooked layers suggests this dish to be of Middle Eastern origin. Carried down trading routes, the recipe was introduced to the East Mediterranean, where it got adopted as a traditional dish of several regional cuisines. But essentially, moussaka is to Greece what lasagna is to Italy. A casserole staple. This particular recipe would also be quite acceptable in the Balkans, where moussaka is very popular, though it is usually made with beef. Living in New Zealand made the great quality lamb mince ready available, making moussaka a regular dish on our late summer menu. 


Ingredients:

Serves 6

Meat sauce
500 g minced lamb
2 Tbsp olive oil
1 chopped onion
4 chopped garlic cloves
1 tsp ground cinnamon
1 tsp ground black pepper
1 Tbsp dried oregano
2 Tbsp thick tomato paste
1/2 cup red wine
1 lemon, zest and juice
Salt to taste

Béchamel sauce
100 g unsalted butter
1/2 cup flour
1 teaspoon salt
3 cups milk
2 egg yolks
1/2 teaspoon ground nutmeg

Moussaka
3 large aubergines (eggplants)
1/2 cup salt
8 cups water
4 large white potatoes
1 cup grated mild cheese
Olive oil

Note: If you’re not a fan of aubergines, this dish can be made with zucchini (5-6 cut lengthwise) using the same cooking method.

Method:
  1. Prepare the meat sauce. Heat the olive oil in a large sauté pan over medium heat and brown the meat. Add the onions about halfway into the browning process. Sprinkle salt over the meat and onions.
  2. Once the meat is browned and the onions have softened, add the garlic, cinnamon, black pepper, oregano and tomato paste. Mix well and cook for 5 minutes.
  3. Add the red wine and mix well. Bring the sauce to a simmer, reduce the heat and continue to simmer gently, uncovered for 20 minutes. Turn off the heat. And taste for salt, add more if needed. Add the lemon zest and the lemon juice. Mix well and set the sauce aside.
  4. Prepare the potatoes and eggplants. Mix the 1/2 cup salt with the 8 cups of water in a large pot or container. This will be the brine for the eggplants.
  5. Slice the top and bottom off the eggplants. Cut thick strips of the skin off and slice the eggplant into 1 cm thick rounds and drop them into the brine. Let the eggplants sit in the brine 15-20 minutes, then remove them to a series of paper towels to dry.
  6. Peel and slice the potatoes into 1cm thick rounds. Boil them in salted water for 5-8 minutes; you want them undercooked, but no longer crunchy. Drain and set aside.
  7. Place the eggplant rounds on the foil and brush with olive oil. Bake in the preheated oven for 3-4 minutes until lightly browned on one side, then flip them over and bake for a few minutes more. Set aside.
  8. Prepare the béchamel. Heat the butter in a small pot over medium heat. When the butter has completely melted, slowly whisk in the flour. When the roux is pale brown, slowly pour in the hot steamy milk, stirring constantly, until the sauce is thick and smooth in consistency. Beat egg yolks in a separate bowl and then slowly pour into the sauce, stirring vigorously. Add about a teaspoon of salt and the nutmeg. Stir well, and set aside.
  9. Finish the moussaka. Preheat the oven to 220 C. Ladle a thin film of  béchamel sauce to the bottom of the casserole dish and then layer half of the potatoes, overlapping slightly. Top the layer of potatoes with a layer of eggplant slices (use just half of the slices).
  10. Cover the eggplant slices with the meat sauce. Then layer remaining eggplant slices on top of the meat. Then add another row of potatoes. Sprinkle half the cheese on top. Ladle the béchamel over everything in an even layer. Sprinkle the rest of the cheese on top.  Bake for 30-45 minutes, or until the top is nicely browned.
  11. Let the moussaka cool for at least 15 minutes before serving.

Saturday 25 August 2012

French Salad (Vegetarian Olivier Salad)


It is a Russian national dish and they call it the Olivier Salad. Eastern Europe, where this is a traditional New Year's side dish, calls it the Russian Salad. Central Europe, however calls it the French Salad. It was invented in 1860 by Lucien Olivier, a Belgian Chef and owner of the Hermitage Restaurant in Moscow. Original  salad was a very complex ensemble of expensive ingredients. But the key to the recipe, secret Provençale dressing, Olivier took with him to his grave. At the turn of the century enterprising Russians adapted the dish for mass production, cutting out the luxuries and replacing the dressing with French style mayonnaise. Further adaption removed the meat and due to the high amount of mayonnaise was named the French Salad. Voila!


Ingredients:

Serves 8-10

5 medium sized white potatoes, cooked, cooled, peeled, diced
5 carrots, cooked, cooled, diced
2 cups garden peas, cooked, cooled
6 boiled eggs, diced
6 large dill pickled gherkins, diced
8 heaped tbsp thick European style mayonnaise
1 tsp Dijon mustard
Salt and pepper
Optional: sour cream, chopped dill or parsley

Note:  This is a very adaptable dish - it has been almost completely transformed from the original Olivier's Salad which contained lettuce, caviar, crayfish tails, veal tongue and smoked grouse, practically only the vegetables were retained, so obviously, it can be well adapted to personal tastes. Celery stalks can add a nice crunch to the salad, as well as green apple. Though, a really good, high quality, creamy European style mayonnaise is the main secret for this dish to be an absolute success. Do not substitute with French Salad Dressing or Sauce Tartare, they are too thin to hold the vegetables.

Method:
  1. Cook all the vegetables and eggs separately, so each vegetable retains its distinctive taste. You can cook the veggies ahead, as the salad has to be assembled with all the ingredients well drained and completely cooled.
  2. In a large mixing bowl start combining ingredients: diced potatoes, diced carrots, diced gherkins, peas, diced eggs. Fold in the mayonnaise and Dijon, making sure you do not break or squash the veggies.  If the finished salad looks as if it needs more dressing, add a dollop of sour cream.
  3. Season well, and garnish with chopped dill or parsley. Serve chilled.

Note: For the Russian Salad just add a cup of diced pressed ham, or smoked chicken, to the above ingredients.


Friday 17 August 2012

Cinnamon Rolls


A cinnamon roll is a sweet yeast pastry served abundantly in cafés and homes throughout Northern Europe. In Sweden, the country of its presumed origin, the 4th October has more recently been promoted into "Kanelbullens Dag" (Cinnamon Roll Day). However, my closest relation to Scandinavia is passion for Swedish crime novels, in which clever detectives solve grisly crimes while chewing on cinnamon rolls and drinking buckets of coffee. An avid coffee drinker myself, I’ve been long looking for a delicious treat to nibble on while reading. My interest was sparked, and after I realised just how incredibly easy they are to make, I acquired passion for cinnamon rolls. But beware, they are highly addictive. My whole family has fallen victim to this buttery little treat and soon we might even start celebrating the Kanelbullens Dag. 


Ingredients:

Serves: 12-14 rolls 

Dough:
400gr flour
7gr (1 Tbsp) dry active yeast
200ml lukewarm milk
40gr caster or soft brown sugar
70gr soft unsalted butter
1/4tsp salt
2 tsp ground cardamom (not a fan - substitute with 2tsp grated lemon peel, it does the trick)

Topping:
100gr soft unsalted butter
70gr caster or soft brown sugar
1Tbsp cinnamon

Method:
  1. Put the flour into a bowl, add the yeast, pour in some milk and mix up with the yeast. Cover it and rest for 10 minutes.
  2. Add the other ingredients for the dough and knead everything into smooth dough. Cover and let it rise for at least 30 minutes (1 hour is better).
  3. Gently press dough down and, on a floured surface, roll into a roughly 30x70 cm rectangle. Mix the ingredients for the filling and spread evenly on the dough. Roll up from one long side, and then cut your roll into 2 cm thick pinwheels.
  4. Press down the flat side of the knife in the middle of the rolls, so that the centre goes down and the cut sides open up a bit.
  5. Put rolls on a parchment baking sheet and let them rise for another 10 minutes or so. Preheat the oven to 220C, egg-wash the rolls and bake for about 12 minutes (do not over bake – they are meant to be just golden brown on the top, soft in the middle and a bit gooey on the bottom).

Note: In Sweden cafés freshly baked Kanelbulle gets topped with a pärlsocker (pearl sugar) not commonly used outside Northern Europe, so you’ll have to finish them off with a good old dusting of icing sugar (it does the trick). Or, omit this step completely as they do not really need any more sugar.


Thursday 16 August 2012

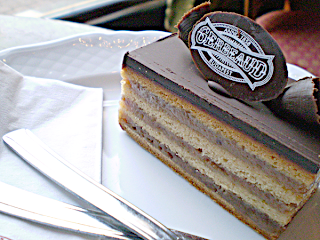
Gerbeaud Slice


This dessert was originally created for the iconic ‘Gerbeaud Café’ in Budapest. Established in 1858, the confectionery flourished when it came into possession of the inventive Swiss pastry chef Emile Gerbeaud, and soon developed into one of Europe’s finest coffee houses. Gerbeaud (Zserbó or Žarbo) slice has been a popular choice for festive baking in Central Europe for 100 years. My husband is a big fan of this sweet little dessert, and since ‘the way to man’s heart goes through his stomach’ I had no choice but to learn how to bake it. Best of all, it's easy to assemble, looks elegant and tastes amazing.


Ingredients:

Yields about 30 pieces, depending on the size of the slices

For the pastry:
170 g softened unsalted cultured butter, plus extra to grease pan
500 g plain flour, sifted, plus extra for rolling
4 tablespoons caster sugar
1 teaspoon lemon zest, grated
1 teaspoon bicarbonate soda
1/2 cup milk
7 g dried yeast (1 tbsp)
1 egg yolk, lightly whisked
2 tablespoons sour cream

For the filling:
300 g thick apricot jam
20 g cocoa
200 g caster sugar
200 g ground walnuts

For the chocolate glaze:
350 g dark chocolate
1 tablespoon unsalted butter

Method:
  1. Preheat oven to 180°C. 
  2. Sprinkle dried yeast and the teaspoon of caster sugar over warm (not hot) milk.  Mix and set aside in a warm spot for 10minutes.
  3. Rub the butter into the flour until the mixture resembles breadcrumbs. Add 4 tablespoons of caster sugar, lemon zest and bicarbonate soda and mix to combine.
  4. Make a well in the centre of the flour, then add the milk/yeast mixture, the whisked egg yolk and the sour cream and mix to make medium-soft dough. Knead briefly. Cover with a clean tea towel and set aside in a warm spot for 10-15 minutes.
  5. Prepare a 23 x 33cm slice tin by greasing it and lining it with baking paper. Cut the dough into three even-sized pieces. Press out into a rectangular shape and then roll out on a lightly floured board. Line the base of the tin with the first layer of pastry. Spread with a layer of the apricot jam (about half the quantity). Sprinkle with half of the combined cocoa and caster sugar and top with a layer of ½ the quantity of ground walnuts.
  6. Roll out the second sheet of pastry; layer it over the pastry with filling already in the tin. Spread another layer of apricot jam and finish off by sprinkling over the remaining cocoa and sugar mixture, followed by the remaining ground walnuts. Roll out the third sheet of pastry and place it on top of the layers in the tin.
  7. Bake in the oven for 30 to 40 minutes, until nicely browned. Set aside and allow cooling.
  8. To make the glaze, melt the chocolate and butter in a bowl over a pot of gently simmering water. Melt until well-combined and then pour evenly over the top of the slice. Use a spatula or palette knife to smooth it over. Set aside to chill. When the glaze has set, use a sharp knife dipped in boiling water to cut the slice into pieces.

Note: The slice is even more delicious the next day, as the flavours develop, and it keeps well in the  air-tight container for up to 2 weeks.